| Watch a Video of this Article |
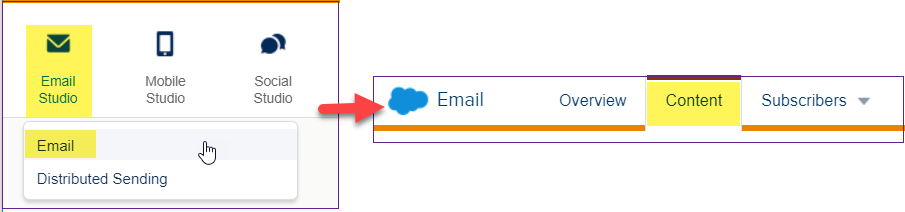
- In the Email application, navigate to Email Studio > Email > Content.
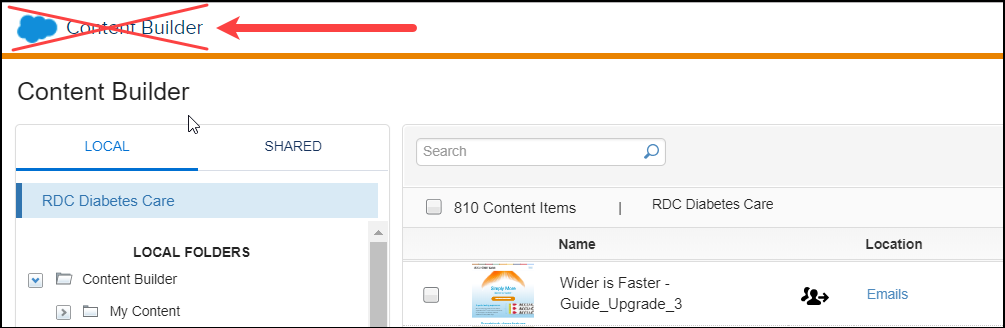
Note: You cannot send an email using Send Flow out of Content Builder. If the top left of the screen says Content Builder, hover over the blue cloud to get to Email Studio.
- Click on the name of your email.
- Review the Details pane at left and review the email content shown on the page.
- From the upper right corner, click the Send button.
- Review your Subject and Preheader and make any edits as needed.
- Click the Saved Send Classification tab and select the appropriate Send Classification.
- If the Sender and Delivery Profiles need to be changed from Default, click on the box then choose the appropriate profile from the dropdown.
- Click Next in the upper right corner.
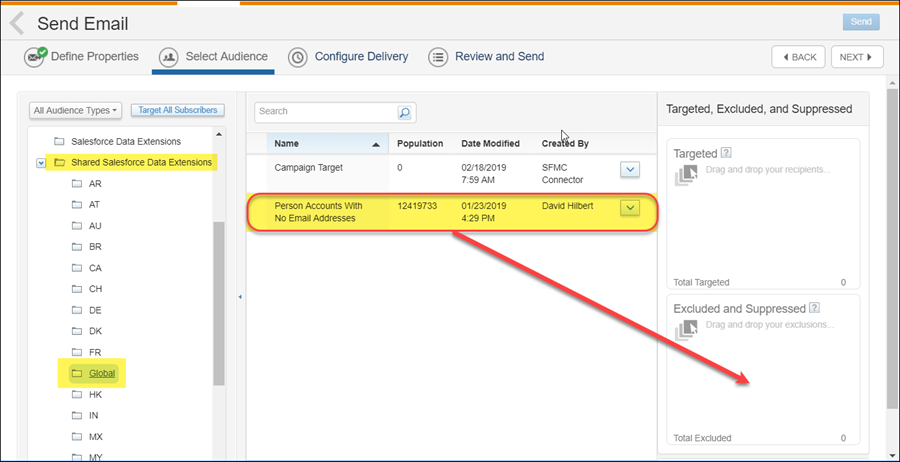
- Under the Select Audience window, navigate to the appropriate data extension, Salesforce Report or Salesforce Campaign.
- Drag and drop the audience to the Targeted field at right.
- Define the Exclusion data extension, Report, or Campaign.
(Note: ALWAYS exclude the data extension called Person Accounts With No Email Addresses in the Shared Salesforce Data Extensions > Global folder. This prevents error/cancellations caused by including records that do not have email addresses or records that recently had the email address deleted.)
- Click Next.
- Under the Configure Delivery screen, select the Schedule radio button and schedule your send Date and Time as desired.
- Check the boxes to Track Clicks and Send Tracking Results to Sales Cloud.
- Under the header Tracking Destination Folder, select the appropriate folder.
- Check the box for Multipart MIME.
- Click Next from the upper-right corner.
- Review the send information in the left pane of the screen carefully.
- Review the content in Mobile and Desktop View in the right pane.
- Check the box to verify This information is correct and this email is ready to send.
- Click Schedule in the upper-right corner.