By following one of the processes below, you will be able to generate a list of all Professional Accounts (HCPs, Pharmacies, Hospitals, etc.) which can be used to send a Marketing Cloud email.
Sections in this article:
- Method 1 - Using a Template Report
- Method 2 - Creating Your Own Report
- Sending Your Email After You Create Your Report
Method 1 - Using a Template Report (recommended if possible)
You may add additional filters to your Report, but do not remove or change any of the filters beyond what is specified in the instructions. Similarly, you may add new fields to your Report, but do not remove any of the fields which exist in the template.
The following outline represents the minimum number of fields and filters required to execute a marketing send in Marketing Cloud. Since HCP data labeling and processes varies among affiliate organizations, you may need to add additional filters to your report to achieve your intended segmentation.
- Open Salesforce CRM and search for this report: SFMC Template Report - Professionals
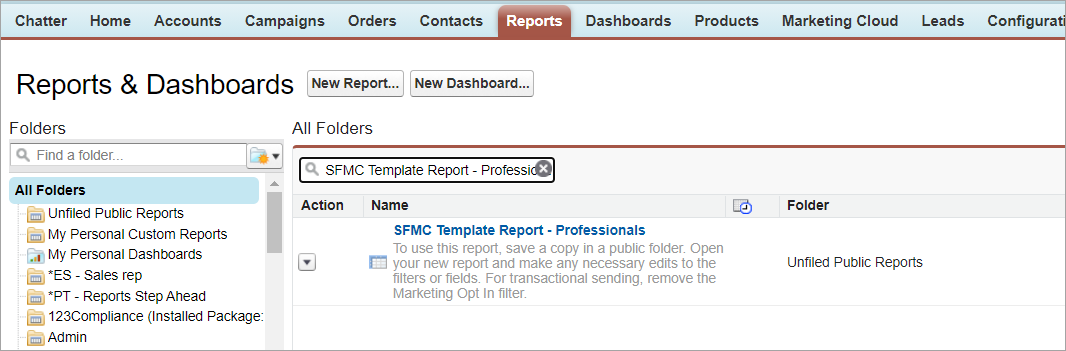
- Click on the report name, then select the Save As button.
Please do not edit the template report directly. This step allows you to make a copy of the template.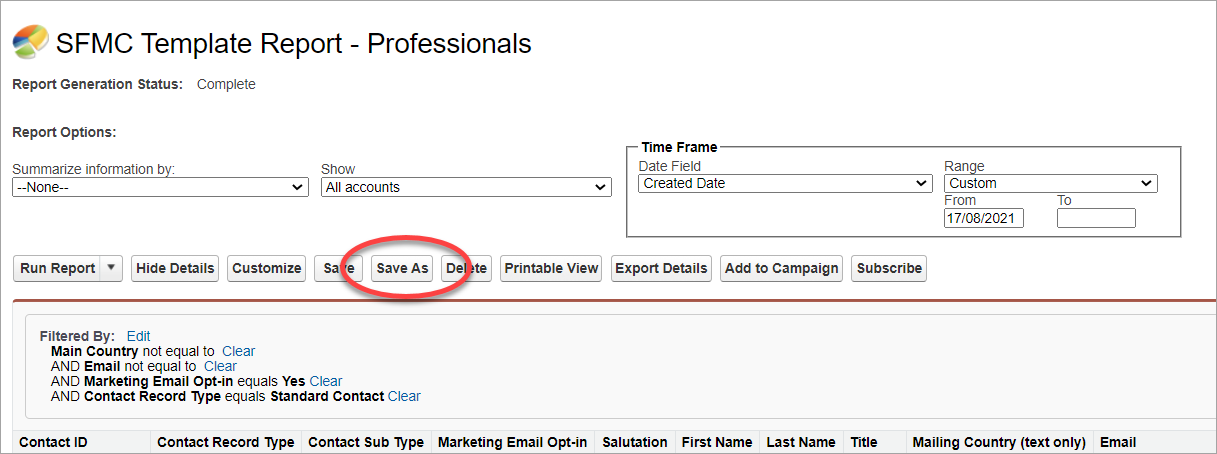
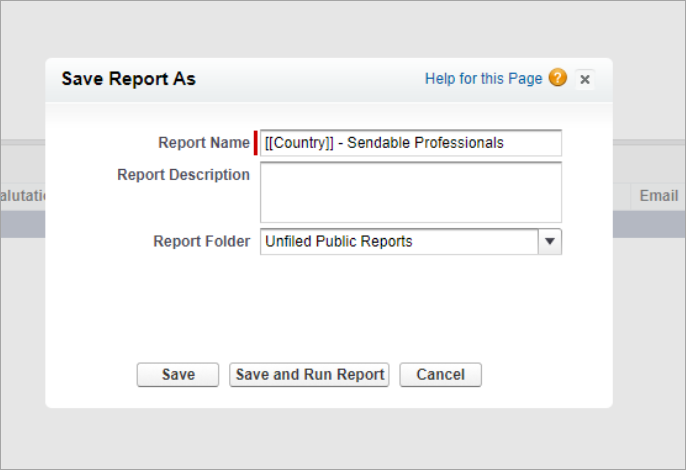
- In the dialog that opens, give your new Report a unique name (for example: “[[Country]] – Sendable Professionals”), and select a public folder from the “Report Folder” menu. Select the “Save” button to save your new Report.
- Note: Many folders are public folders. If you have trouble finding a suitable folder, save your new Report to “Unfiled Public Reports.”
- Note: Many folders are public folders. If you have trouble finding a suitable folder, save your new Report to “Unfiled Public Reports.”
- With your new Report open, select the Edit option next to the filter for Main Country. Then, select the icon next to the empty field.
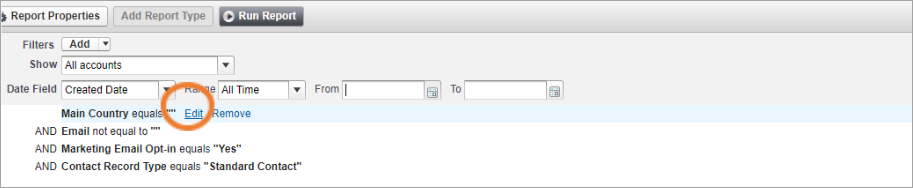

- In the dialog menu that opens, check the box next to your target country (or countries). Select the Insert Selected button to insert your selections into the filter.
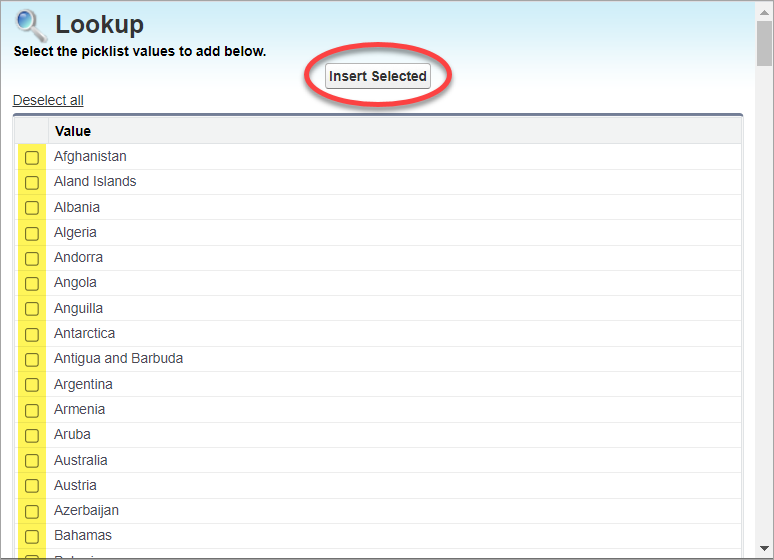
- Finally, select the OK button next to the Main Country filter, and save your report. After saving, you may close your Report.
- You are encouraged to include additional filters to segment your report to only the most applicable, targeted records for best engagement results. The filters above are the minimum filters required for sending. The filters above are the minimum filters required for sending. Examples of additional Professional filters could include:
• Account Business Classification
• Contact Business Classification
• Account Type
• Account Subtype
Method 2 - Creating Your Own Report
- Create a report in CRM for Professional accounts, per the normal process, using the Contacts & Accounts Report type. Please ensure to include the following filters:
a. Contact Record Type equals "Standard Contact" (required to ensure professional records only)
b. Main Country equals (select your country from the pick-list)
b. Email not equal to "" (don't type anything in the field)
c. Marketing Email Opt-in equals "Yes"
The report must contain the Contact ID from the Contact: General folder object as shown in the example below. Please be sure the ID begins with 003 and has 15 digits. Also include required columns Email and Marketing Email Opt-in.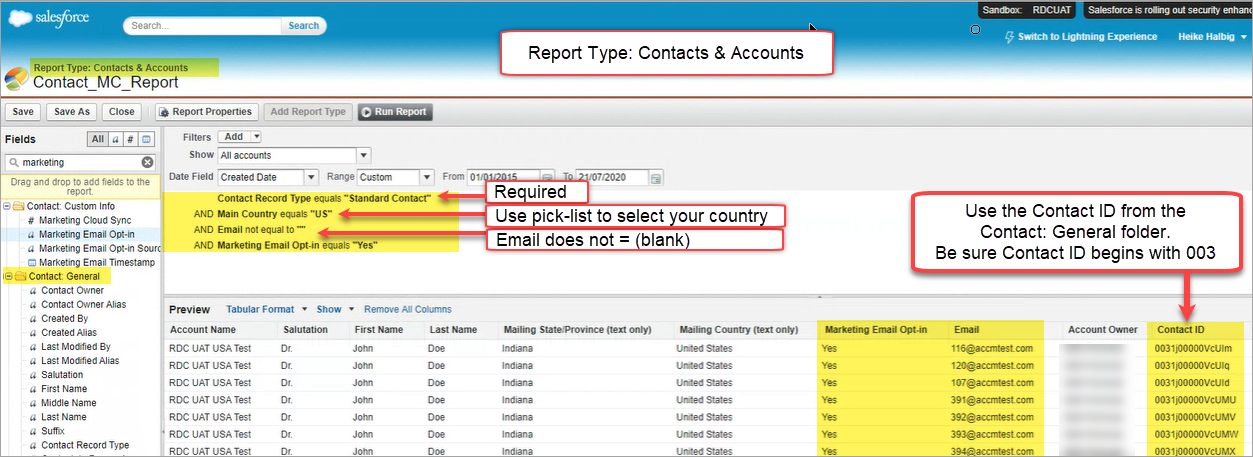
You are encouraged to include additional filters to segment your report to only the most applicable, targeted records for best engagement results. The filters above are the minimum filters required for sending. Examples of additional Professional filters could include:
• Account Business Classification
• Contact Business Classification
• Account Type
• Account Subtype
Sending Your Email After You Create Your Report
- After creating your report in CRM, go to Marketing Cloud. Open Content Builder and navigate to your email. Click the down pointing arrow
 on the far right and select Send.
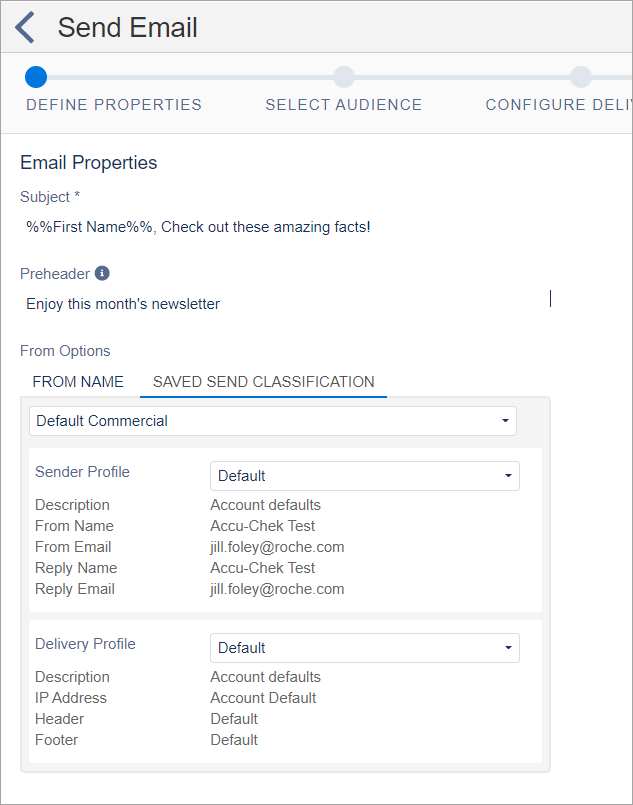
- On the Define Properties screen, review your Subject and Preheader. In the From Options, review the Saved Send Classification tab and select the appropriate Sender Profile and Delivery Profile (if you use one different from the Default).
- Click Next in the upper right corner.
- Under the Select Audience window, click the Salesforce Reports folder.
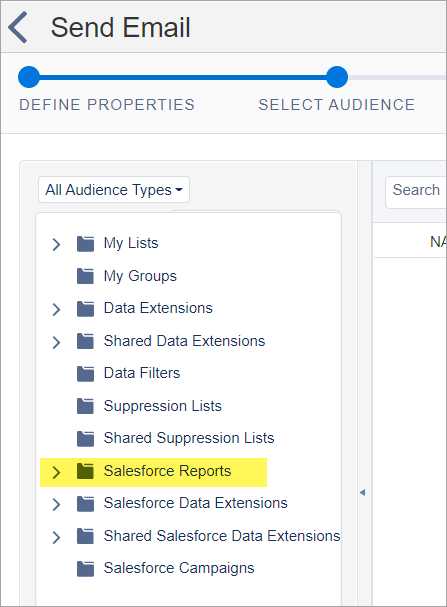
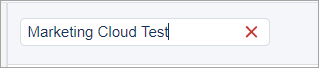
- In the Search field, enter the name of the report you created in CRM to locate it.
- In the Sendable column, be sure it says Yes.
If your report has a "No" in the Sendable column, you are likely missing the correct Contact ID field. If that is the case, go back to CRM, add the Contact ID that begins with a 003# and has 15 digits, then resave your report. (Note: the Sendable Yes/No column can take some time to populate, so if that column is blank, wait a moment.)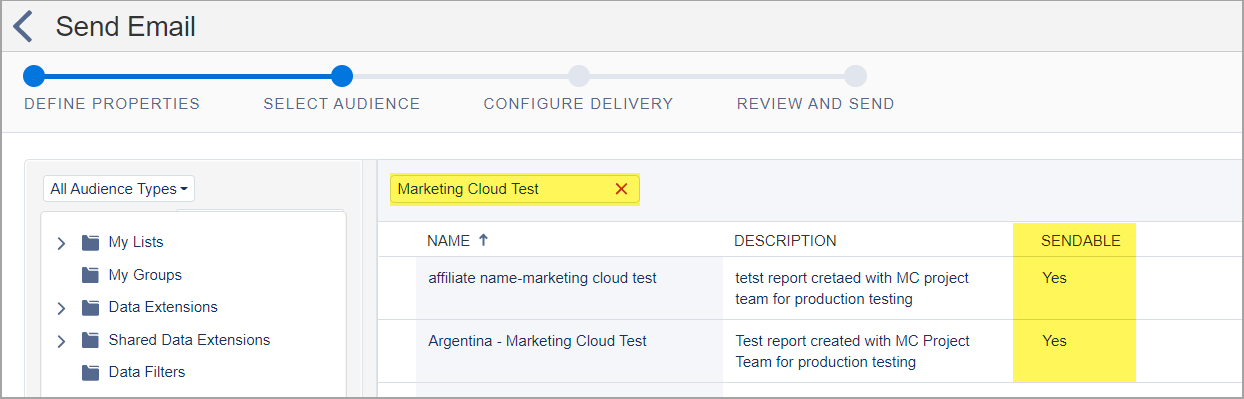
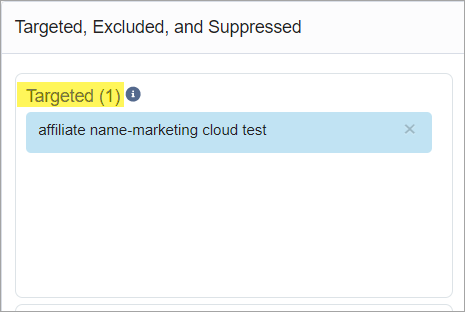
- Drag and drop the report to the Targeted field at right.
- Click Next.

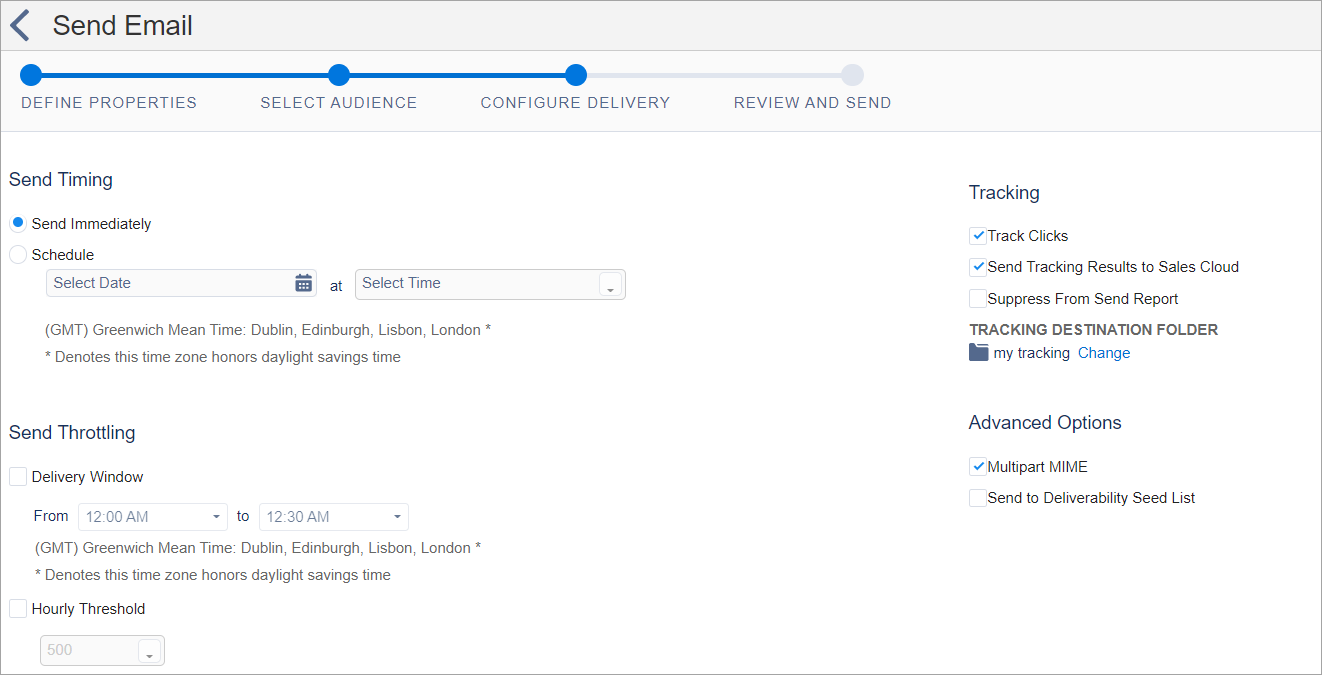
- In the Configure Delivery screen, schedule the send as desired. Check the boxes to Track Clicks, Send Tracking Results to Sales Cloud and Multipart MIME.
- Click Next.
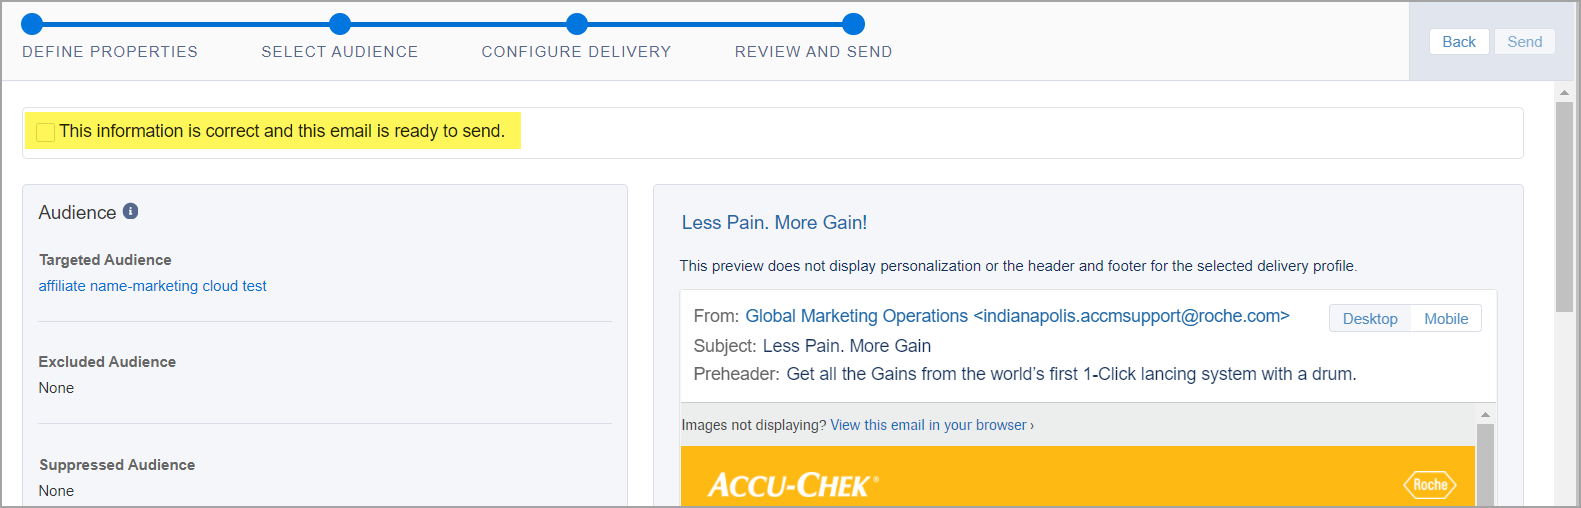
- On the Reveiw and Send Screen, review the Audience information in the left pane of the screen. Review the email in right pane to ensure eveything displays correctly on the desktop & mobile views, and the From sending information is correct. When you are certain everything is correct, check the box to verify "This information is correct and this email is ready to send."
- After checking the box
 , the blue send button in the upper right will become active. Click Send (if you are scheduling your email to go out at a later time, the blue button will say Schedule.)
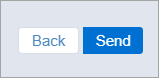
- A green confirmation message will appear on the top of the screen.
