One of the biggest mistakes that affiliates make is forgetting to map their journeys. If you jump into Journey Builder without mapping your journey first, you may forget some essential steps. For this activity, you will need Journey Builder activity cards and a large, flat surface. Journey Builder cards can be found attached as a PDF. The entire process should take about an hour.
- [5 MINUTES] Define your lifecycle stages. There are typically 5 stages within a lifecycle. Some examples include:
- For consumers: Awareness > Acquire > Onboard > Engage > Loyalty
- For providers: Research > Pre-Care > Care > Post-Care > Retain
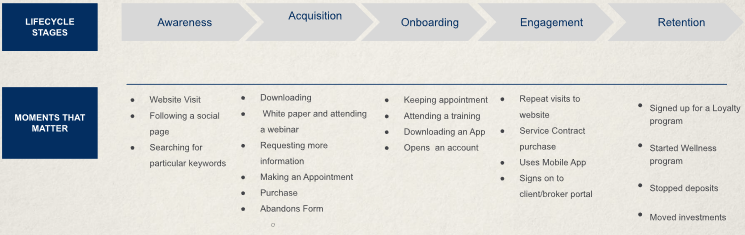
- [10 MINUTES] For each lifecycle stage, identify moments that matter. An example for the consumer lifecycle stages:
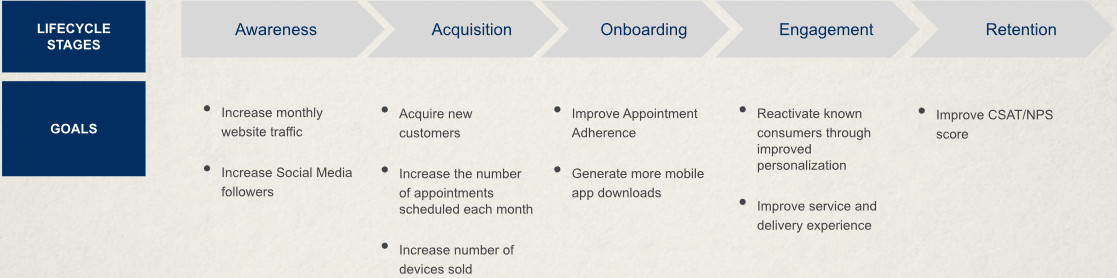
- [10 MINUTES] For each lifecycle stage, identify goals. An example for the consumer lifecycle stages:
- [3 MINUTES] Circle the one goal you want to solve with your journey.
- Create a S.M.A.R.T. goal from the goal you circled. Examples include: Increase website visits by 50% by December 15, increase upgrade conversion rate to 10% by the end of the quarter, drive a 15% increase in Twitter followers by the end of the year.
- Specific – What do you want to do?
- Measurable – How will you know when you’ve reached it?
- Achievable – Is it in your power to accomplish it?
- Realistic – Can you realistically achieve it?
- Timely – When exactly do you want to accomplish it?
- [5 MINUTES] Identify your audience. Who is the ideal customer that you are trying to target? Be specific. Try to create a realistic patient profile. Ex. Women, ages 30-40, living in Southern California, no children but looking to get pregnant.
- [10 MINUTES] Identify the data you currently have and the data you still need.
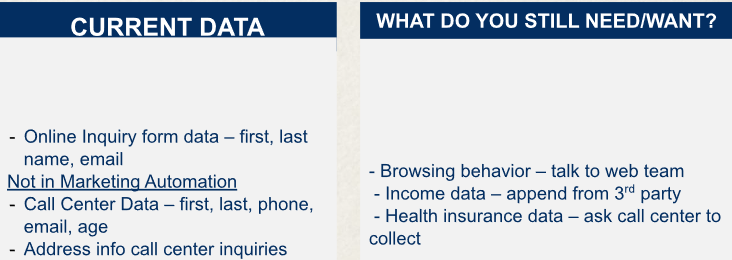
- Check the data you have – Check your data quality, accessibility, and completeness. Where does the data come from? What is the source? Where does it live? How complete is it? How easy is it to access and use?
- Document the data you need – Define the data you’re missing. Does it exist but is inaccessible? Do you need to start collecting it?
- Envision the data you want – Consider the hard-to-access data points and ways to work around them.
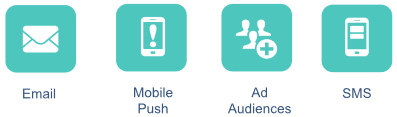
- [15 MINUTES} Identify channels you currently use and the channels you want to use in the future. Do the same for content.
- In-Journey Content: Content in the delivered message itself that can be consumed without leaving the inbox or screen. A common example is email.
- Outside-Journey Content: Resources the customer navigates to with a click or tap. Examples include but are not limited to downloadable, interactive, and web content.
- [20 MINUTES] Layout your journey with journey cards (see attachment). Here are some good reminders:
- Journeys must start with an Entry Source. Roche affiliates will typically use Synchronized Data Extensions. Note: All the activities may not be available within your deck of cards.
- Journeys contain Channels, which are the different types of messages that can be sent to a contact in the journey. Currently, Roche affiliates only have access to the email channel.
- There must be at least one Wait between every activity. Wait times can be adjusted to be as short as one minute if no wait time is wanted. Note: The wait time is required to allow the system to process.
- You must have a Message in your journey before you can place an Engagement Split.
- Splits create branches from a singular path.
- Joins will bring together multiple paths into one conjoined path.
- Every journey should have a Goal that you would like to achieve. The goal for a portal adoption may be “40% of new patients enroll in portal in 7 days”.
- Crawl before you walk before you run! Start slow and lay a foundation before you expand to more channels and branches.
- When you are finished you should have a functionally mapped out journey on your white board from start to finish:

Congratulations! You have successfully mapped a journey. You can now build your journey in Journey Builder.