!NOTE: Please make sure you review Microsite Timelines and Expectations should you want to involve the Global Support Team.
|
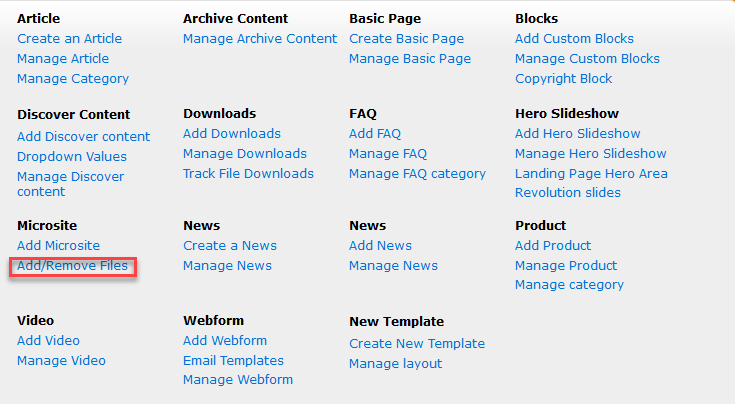
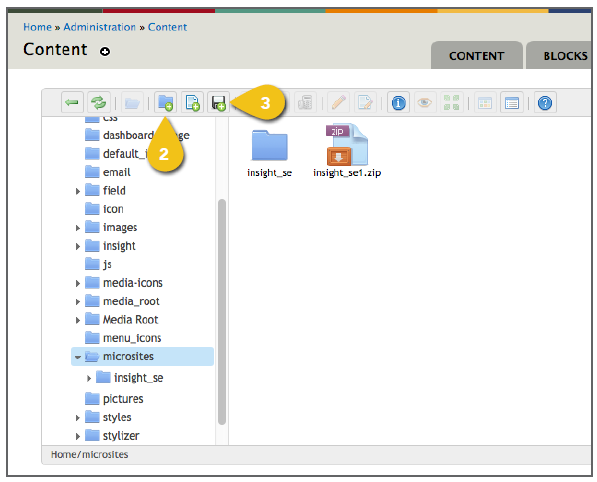
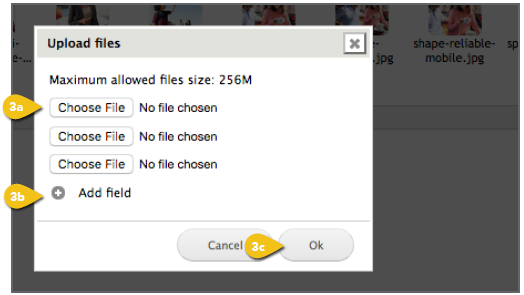
Load Files Select Add/ Remove Files under Microsite. You will see a list of top-level files on the left. 1. Select Microsite from the file list. 2. Create Folders to keep your assets organized. Select the parent folder (i.e. Microsites), then click the New Folder icon in the toolbar at the top of the control panel or right-click for a pop-up menu. When a new folder appears, you can change the name. We recommend folders for Fonts, CSS, Images, JavaScript, Videos and any others you might need. 3. Add Files: Upload any images, videos, scripts and fonts. You can drag files into the folder, select the disc icon in the toolbar or right-click to upload. a. Choose File: Click Choose File to browse for a file to upload. When you select the file, click Open. Files must be uploaded individually. b. Add Field: Select Add Field to add more files to the queue and simplify uploading multiple files. c. OK: When you have selected all the appropriate files, click OK.
! Do not use any absolute URLs. All paths should be relative. ! Plan ahead for implementing Google Tag Manager script. Google Tag Manager code is pulled automatically for pages built in the WCMS. This must be done manually for microsites, so a placeholder must be used. ! Include only client side scripts such as HTML, CSS and JavaScript. There should be no server-side scripts such as PHP or ASP.
|
|
|
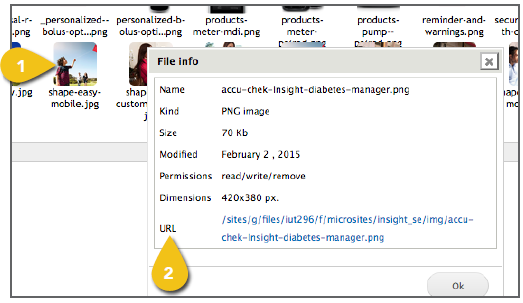
Check Paths 1. Once a file has been loaded into the WCMS, single-click on the file name or thumbnail to highlight it, then click the Get Information icon in the toolbar or right-click to see the URL that has been assigned. 2. Copy this URL and paste it into the HTML code on the microsite page to pull in the image or asset. |
|