!NOTE: Please make sure you review Microsite Timelines and Expectations should you want to involve the Global Support Team.
|
Creating a microsite within the WCMS allows your content to be searched from within the primary site while still allowing it to have a distinct look and feel and a separate presence online. A few things to keep in mind: • A responsive design is preferred. • If you have any special rules that require Drupal PHP, such as generating unique voucher codes, sending system e-mails or creating complex web forms, please arrange for the agency to work with the Global team early in the process. This will help keep the project on schedule and avoid surprises at launch. • Plan ahead for implementing Google Tag Manager script. Google Tag Manager code is pulled automatically for pages built in the WCMS. This must be done manually for microsites, so a placeholder must be used. |
 |
|
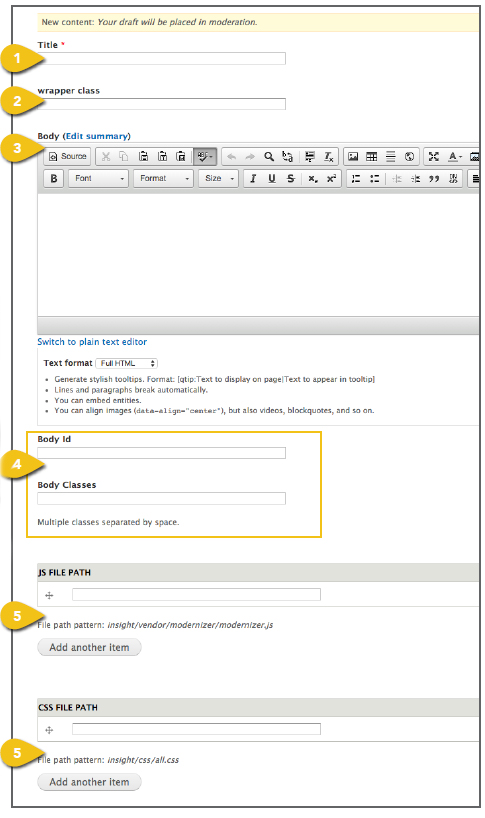
Step 1. Create Pages The first step is to select Create A Microsite from the Manage Content dropdown and complete a page template for each page within the microsite. 1. Title: Enter a page title. Depending upon the wrapper class chosen, it may or may not appear on the page. 2. Wrapper Class: Add classes to the wrapper as needed. 3. Body: Enter complete HTML code for the page here. Unlike pages that live within the primary domain, these pages need to be designed and developed in HTML and copied into this field. ! Do not use any absolute URLs. All paths should be relative, and will be addressed in step 3, below. ! Plan ahead for implementing Google Tag Manager script. Google Tag Manager code is pulled automatically for pages built in the WCMS. This must be done manually for microsites, so a placeholder must be used. ! Include only client side scripts such as HTML, CSS and JavaScript. There should be no server-side scripts such as PHP or ASP. 4. Body ID and Body Classes: Add IDs and classes to the body tag as needed. 5. JS or CSS File Path: Enter the WCMS pathway to the corresponding JS and CSS files. |
 |
|
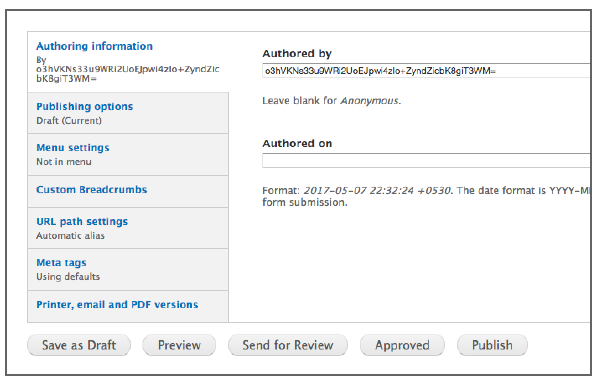
Additional Content These tabs appear beneath the primary content fields in the template. Get step-by-step instructions for the remaining options, including Publishing Options, Menu Settings and Custom Breadcrumbs in the Additional Content Details section. Meta Tags Add page and content Meta Tags that incorporate popular search terms to aid in search performance and user access. See Meta Tags for additional detail. Save Save your work by selecting Save at the bottom of the page. It will not be published until the Published checkbox is selected under Publishing Options. |
 |
|
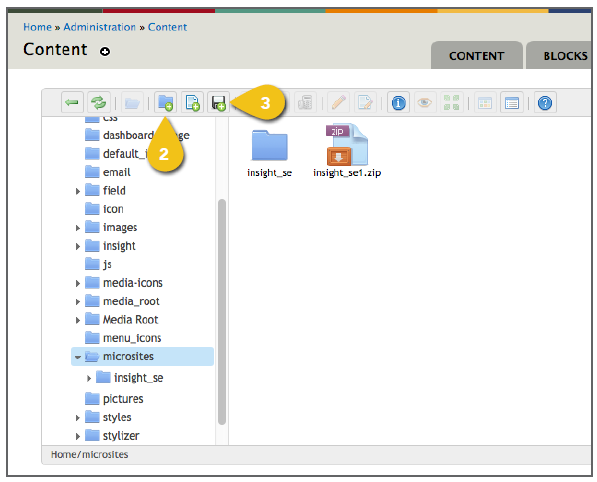
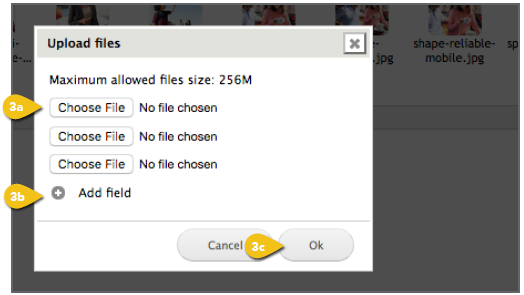
Step 2. Add Files Once a page is created, return to the Manage Content dropdown and select Add/ Remove Files under Microsite. You will see a list of top-level files on the left. 1. Select Microsite from the file list. 2. Create Folders to keep your assets organized. Select the parent folder (i.e. Microsites), then click the New Folder icon in the toolbar at the top of the control panel or right-click for a pop-up menu. When a new folder appears, you can change the name. We recommend folders for Fonts, CSS, Images, JavaScript, Videos and any others you might need. 3. Add Files: Upload any images, videos, scripts and fonts. You can drag files into the folder, select the disc icon in the toolbar or right-click to upload. a. Choose File: Click Choose File to browse for a file to upload. When you select the file, click Open. Files must be uploaded individually. b. Add Field: Select Add Field to add more files to the queue and simplify uploading multiple files. c. OK: When you have selected all the appropriate files, click OK.
|
|
|
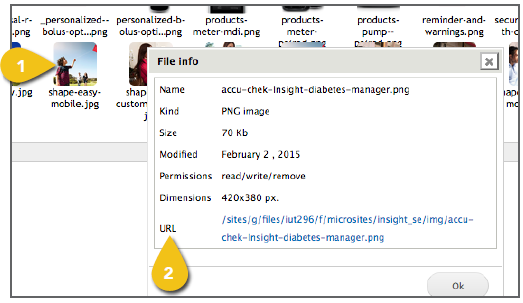
Step 3. Update Paths The location of each asset uploaded into the WCMS must be entered into the HTML code on the microsite pages. 1. Once a file has been loaded into the WCMS, single-click on the file name or thumbnail to highlight it, then click the Get Information icon in the toolbar or right-click to see the URL that has been assigned. 2. Copy this URL and paste it into the HTML code on the microsite page to pull in the image or asset. |
|